How to Build a Custom WooCommerce Checkout Page in Elementor
The Checkout Page widget allows you to display the WooCommerce checkout layout inside Elementor pages. This widget helps you create a custom checkout experience with layouts such as split and multi-step checkout designs.
The widget loads WooCommerce checkout fields, order summary, notices, and place-order actions inside your Elementor layout. You can also style the checkout form and sections without editing WooCommerce templates.
This widget is typically used when creating a custom WooCommerce checkout page with Elementor.
Part of WooCommerce Elementor Widgets #
The Checkout Page widget is included in the WooCommerce widget collection available in Spexo Addons. These widgets help you design WooCommerce pages and store layouts directly inside Elementor. You can explore the full library in the WooCommerce Widget Directory.
When to Use the Checkout Page Widget #
The Checkout Page widget is used when you want to replace the default WooCommerce checkout page with a custom Elementor layout.
This widget is useful when you want more control over checkout design, spacing, titles, form styling, and order sections. It works well with widgets that Create Custom Cart Layouts and Display WooCommerce Notice Messages.
Requirements #
Before using the Checkout Page widget, make sure the required plugins and page settings are configured correctly.
- WooCommerce plugin installed and activated
- Elementor active on your website
- A page created for the custom checkout layout
- WooCommerce checkout page assigned in WooCommerce settings
- Spexo Addons Pro installed and active
This widget works on Elementor pages assigned as the WooCommerce checkout page.
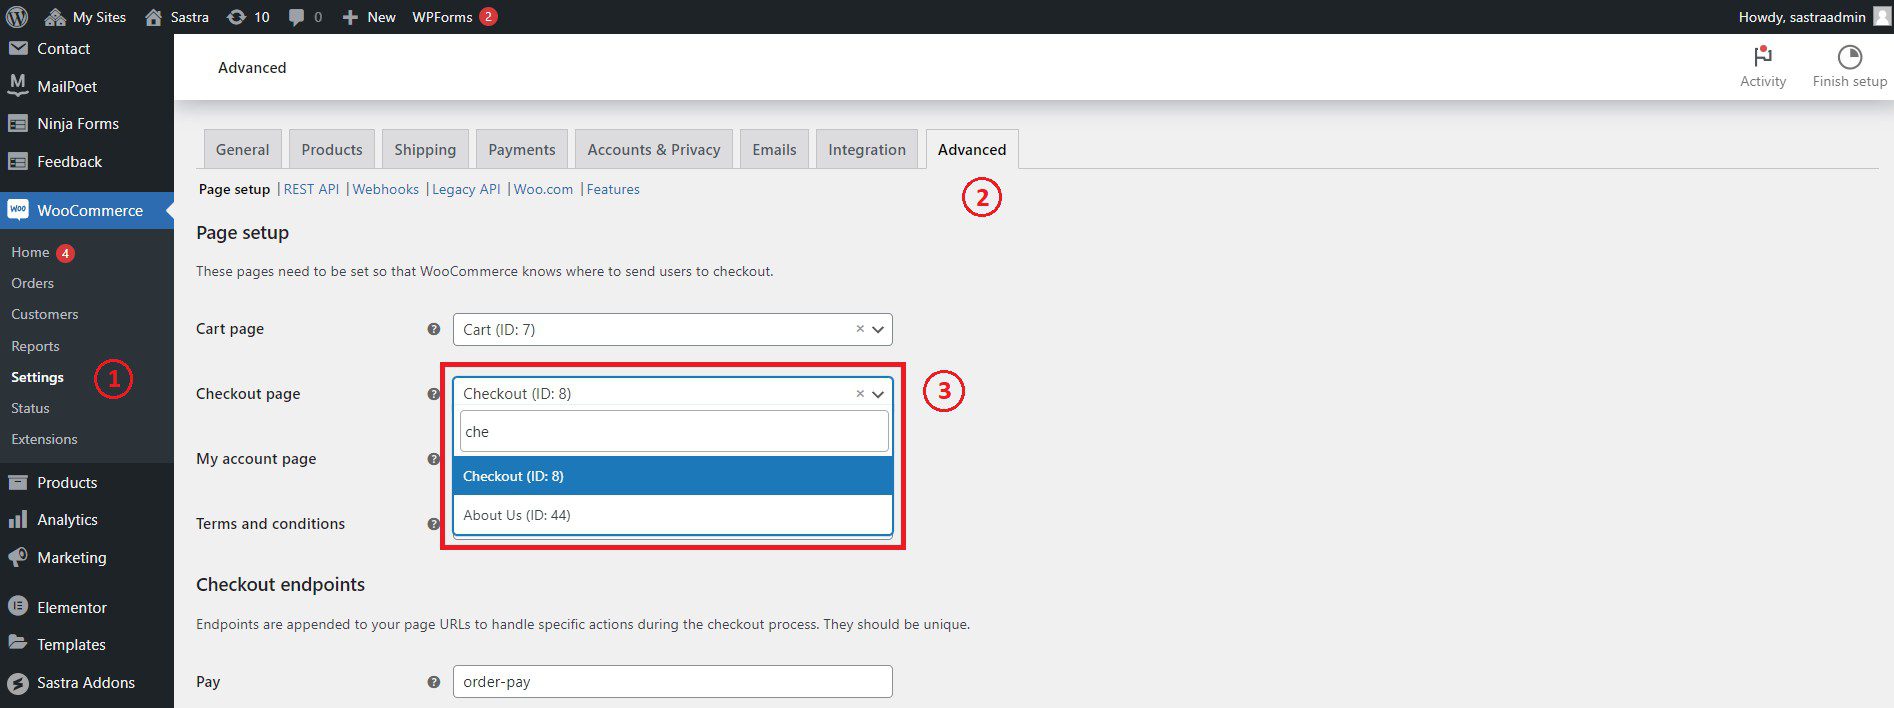
How to Set Up the WooCommerce Checkout Page #
Before using the widget, assign a page as your WooCommerce checkout page.
- Open your WordPress Dashboard.
- Go to WooCommerce → Settings → Advanced.
- Select the page you want to use as your Checkout Page.
- Save the changes.
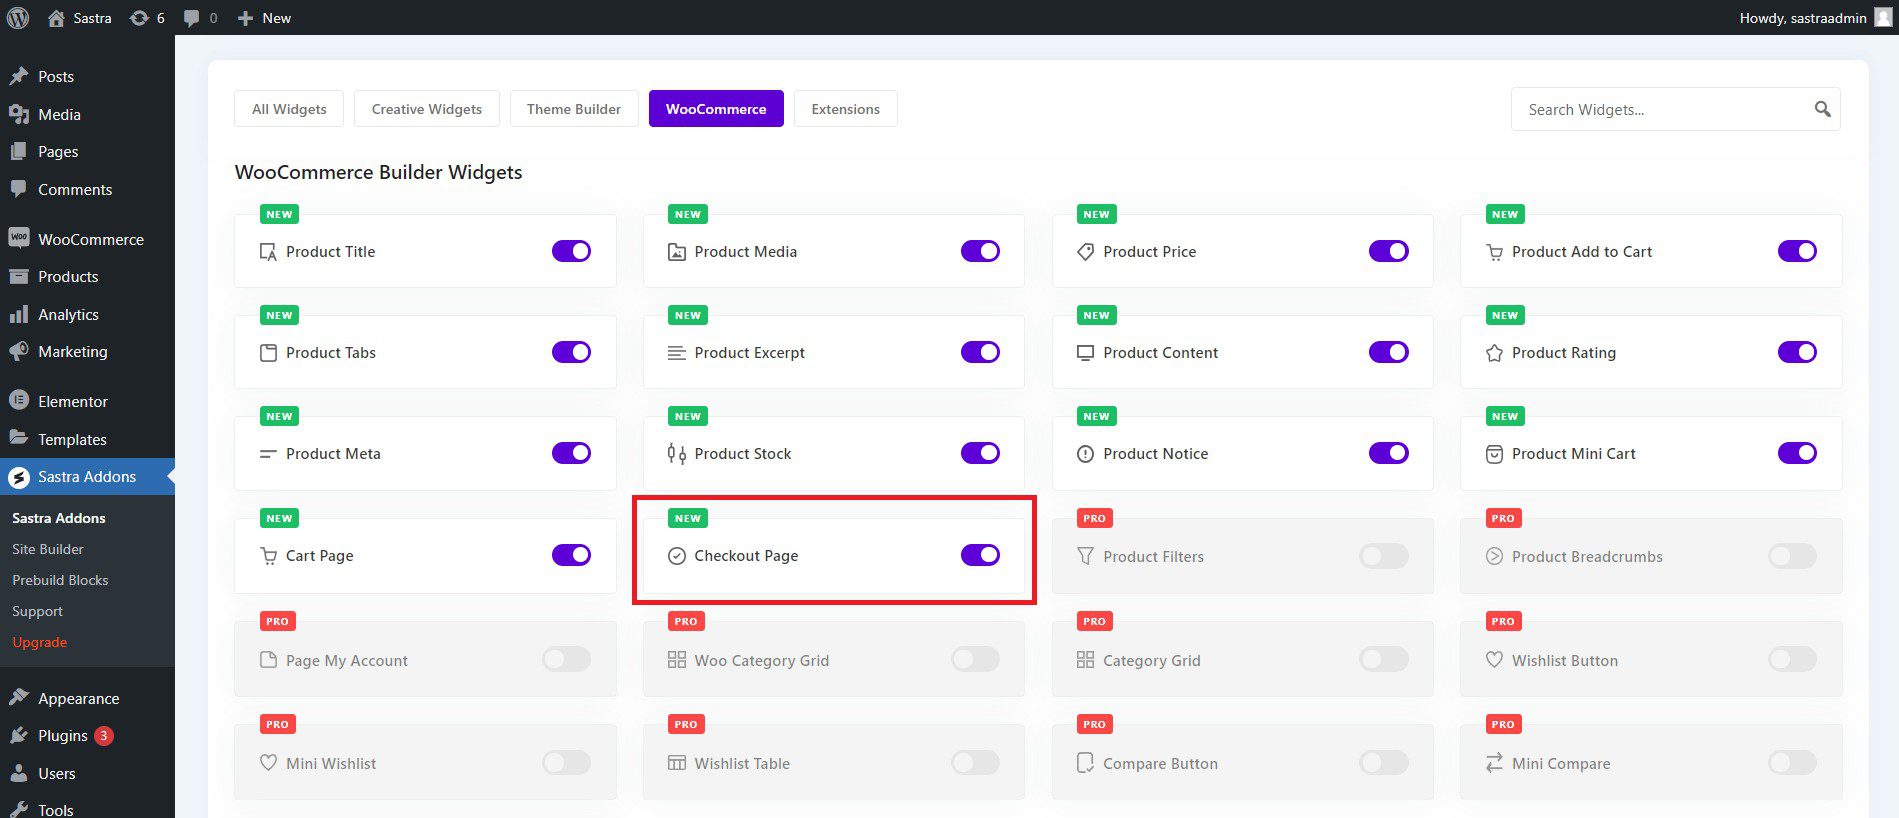
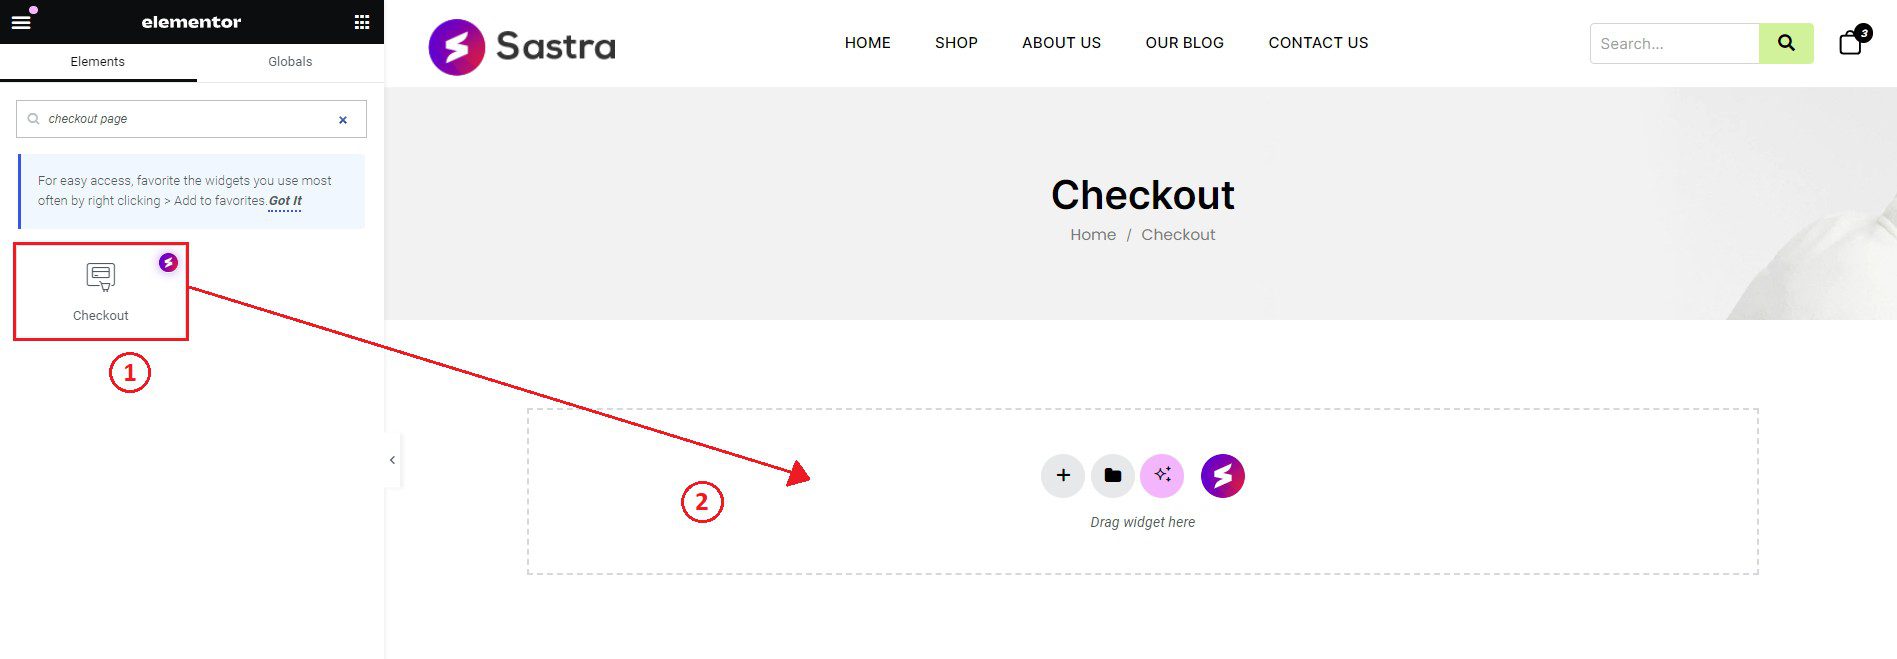
How to Activate the Checkout Page Widget #
After assigning the checkout page, edit that page with Elementor.
Go to Spexo Addons → Widget Settings and filter by WooCommerce. Enable the Checkout Page widget. Then search for the widget inside Elementor and drag it into your page layout.
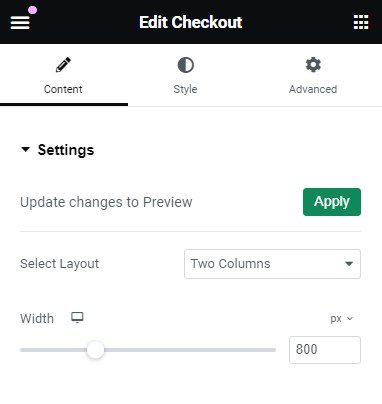
Content Settings #
Open the Content tab in Elementor to configure the checkout layout options.
Settings #
From this section, you can choose your preferred checkout layout and adjust width settings for the WooCommerce checkout page.
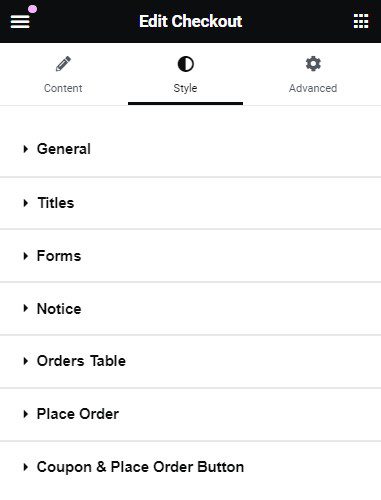
Style Settings #
Open the Style tab in Elementor to customize the appearance of the checkout page.
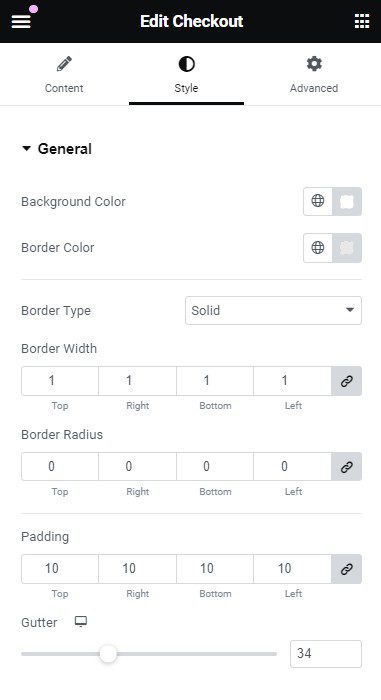
General #
This section lets you set background color, border color, padding, gutter, border style, and border radius for the main checkout layout.
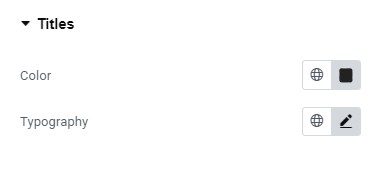
Titles #
This section lets you control title color and typography for checkout headings.
Others #
From this section, you can style form labels, input fields, notices, the order table, and the place order area. You can also customize the appearance of coupon and place order buttons.
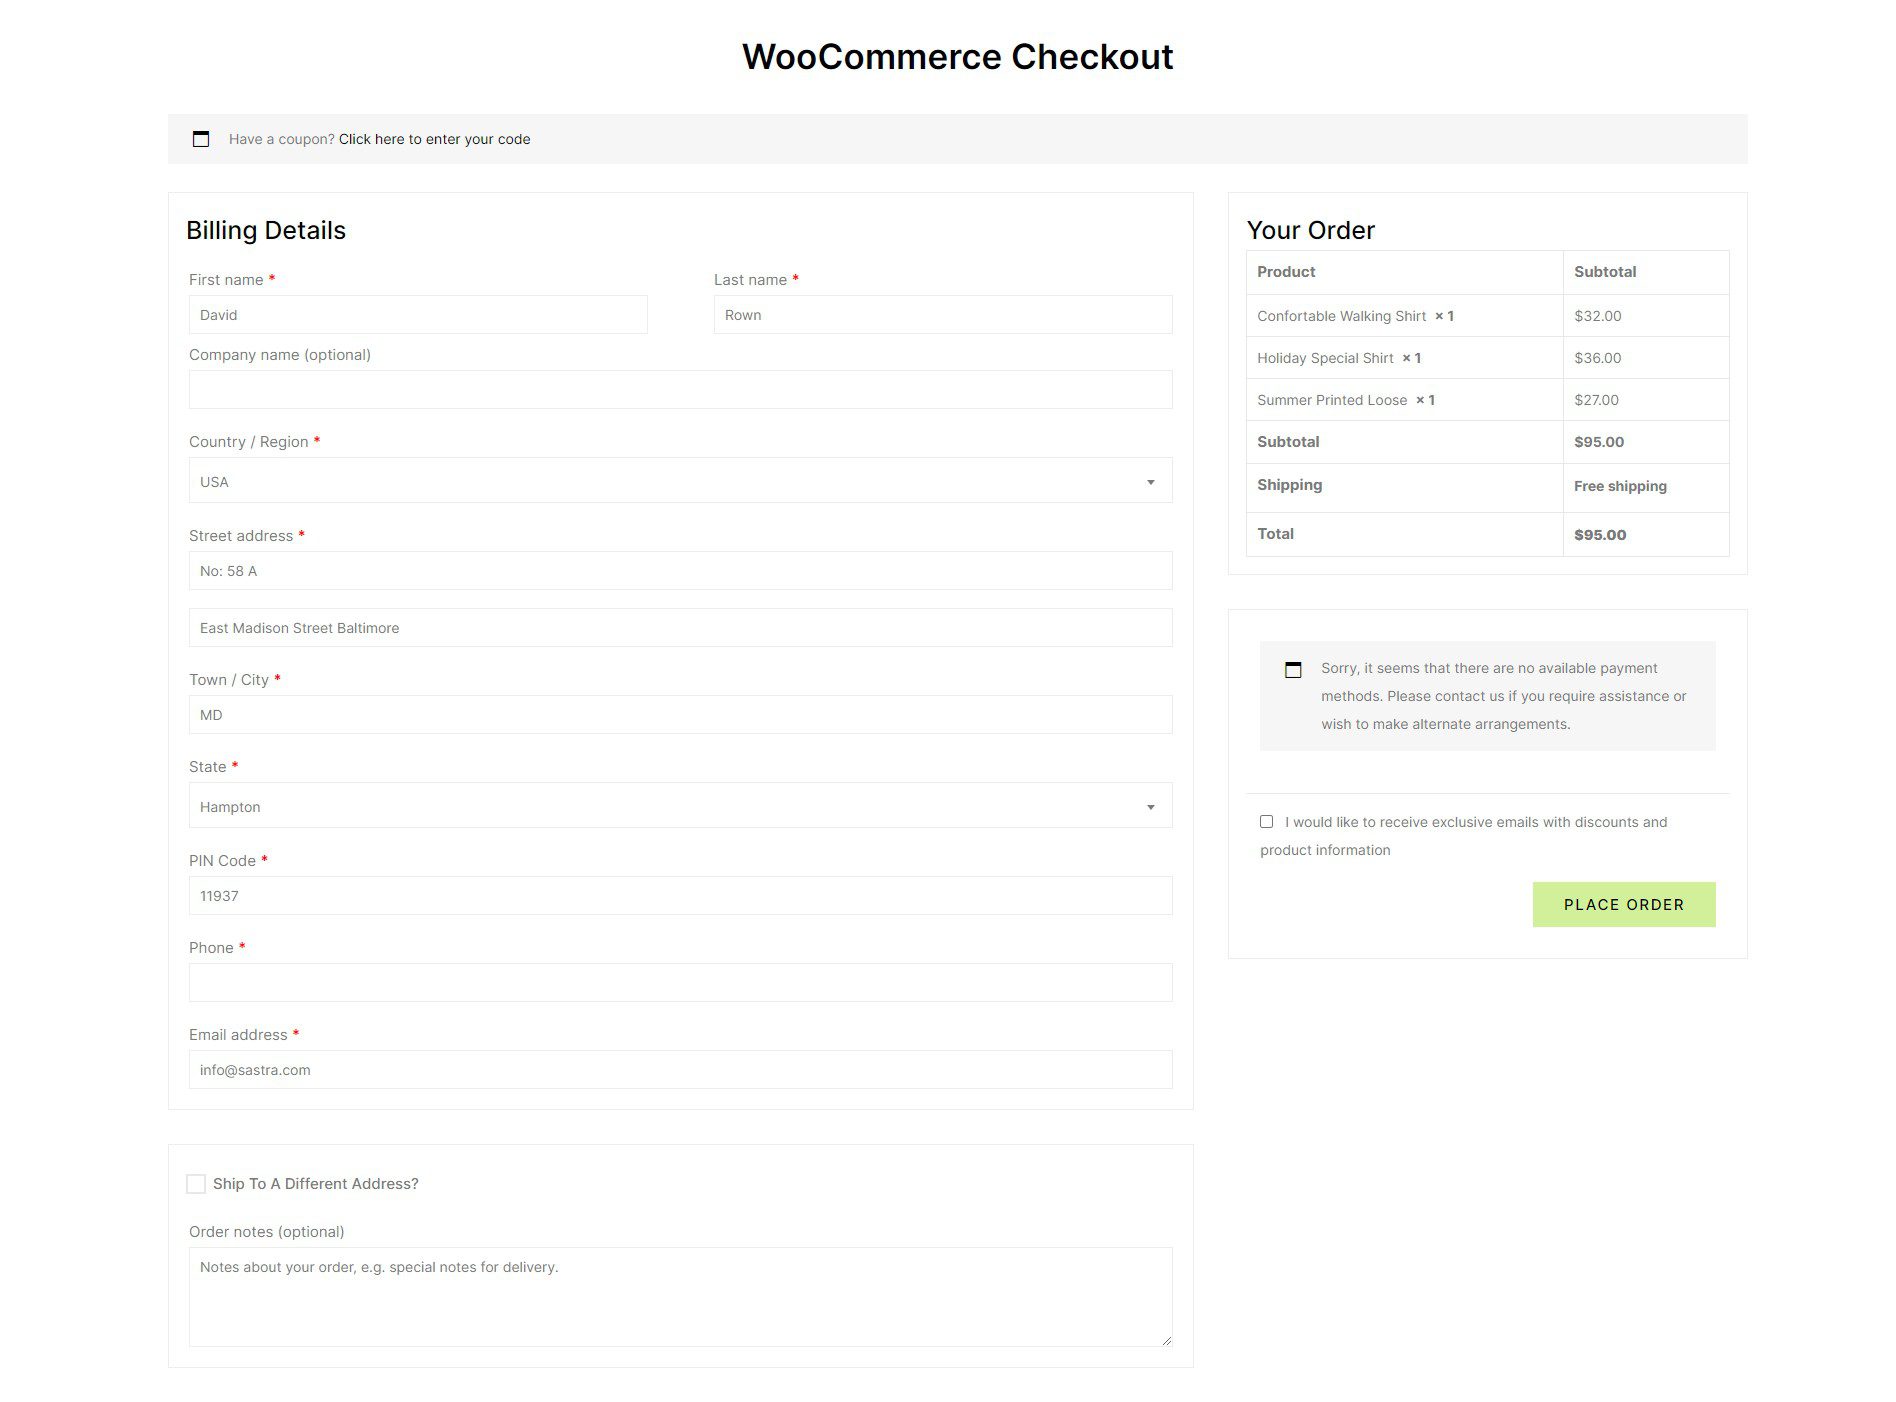
Final Outcome #
After configuring the content and style settings, you can create a custom WooCommerce checkout layout that matches your store design.
Common Issues and Fixes #
If the checkout layout does not display, confirm that the correct page is assigned as the WooCommerce checkout page in WooCommerce settings.
If the widget does not appear in Elementor, review the Widget Activation Guide and confirm that the widget is enabled in Spexo Addons.
Frequently Asked Questions #
Can I replace the default WooCommerce checkout page? #
Yes. This widget lets you assign a custom Elementor page as the WooCommerce checkout page.
Can I create a multi-step checkout layout? #
Yes. The widget supports multiple checkout layout styles, including split and multi-step layouts.
Can I style checkout fields and order sections? #
Yes. The style settings include controls for general layout styling, titles, form fields, notices, order tables, and buttons.
Getting stuck? Feel free to Contact Our Support for further assistance.