How to Embed a Mailchimp Signup Form in Elementor
How to Configure and Style MailChimp #
Spexo Addons MailChimp for Elementor can help you to design your MailChimp form easily with lots of customization options. With the help of this element, you can easily get the attention of your visitors’ and make them subscribe to your newsletter.
How to Activate MailChimp #
You must have a MailChimp account to activate MailChimp. If you already do, then start following the below instructions.
Setup MailChimp Account #
You can simply check out this documentation to see how to create an account in MailChimp.
Generate API Key #
Once you are successfully signed up, log in to your MailChimp account. Then go to the Account page.
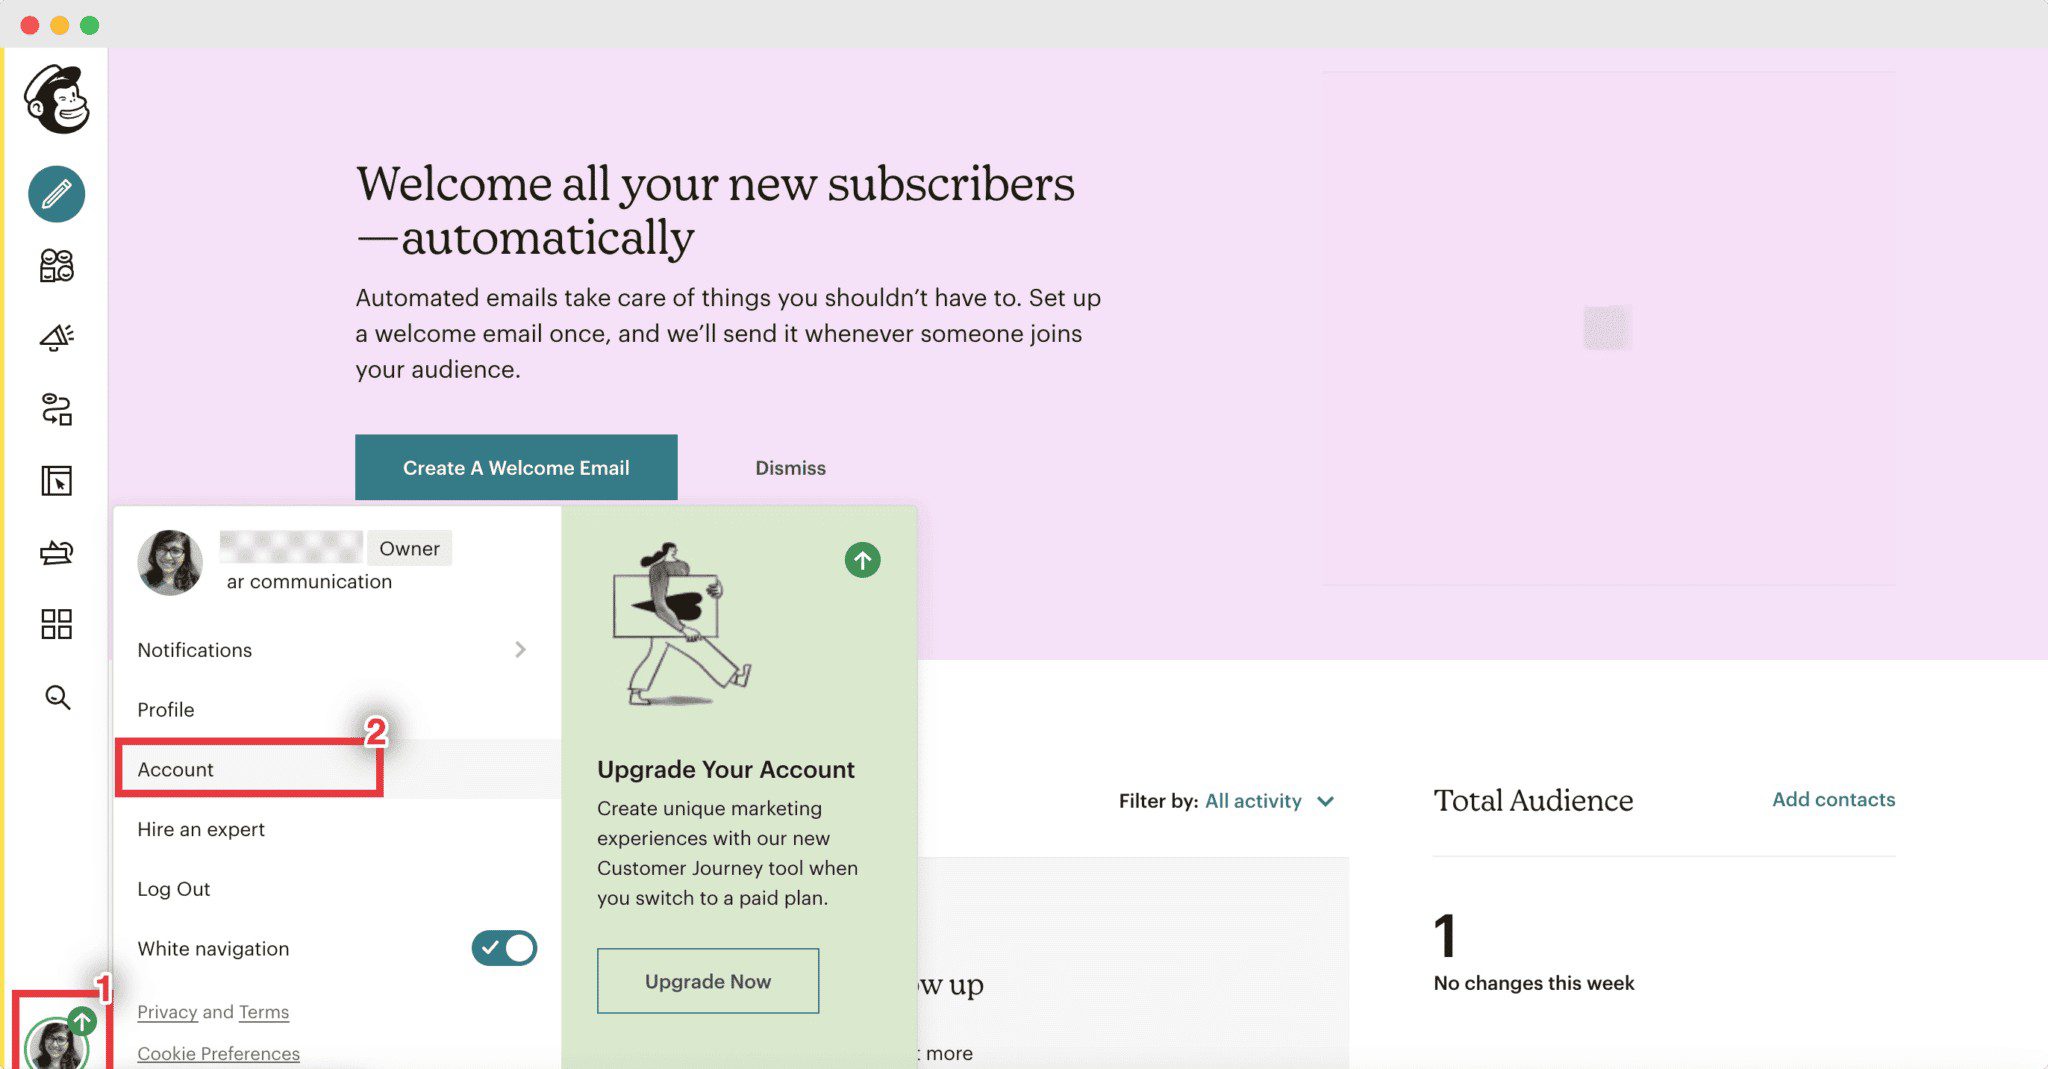
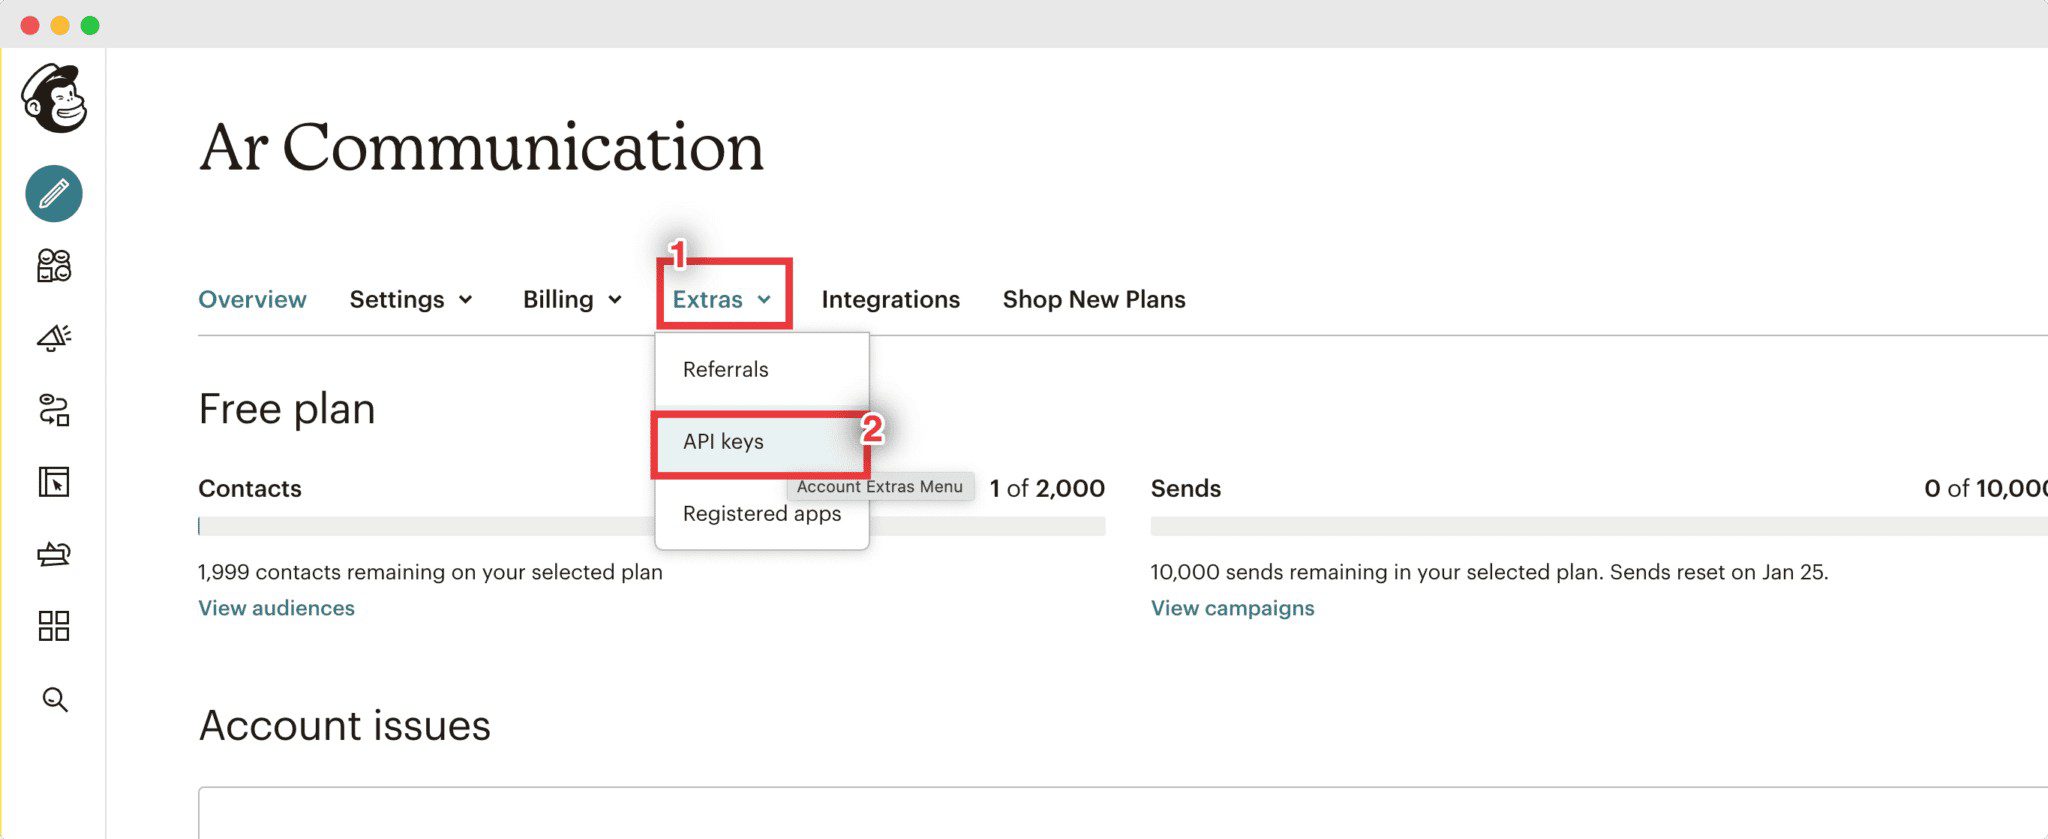
Once you are inside the Account page, click on the Extras Menu section and choose the “API Keys” option.
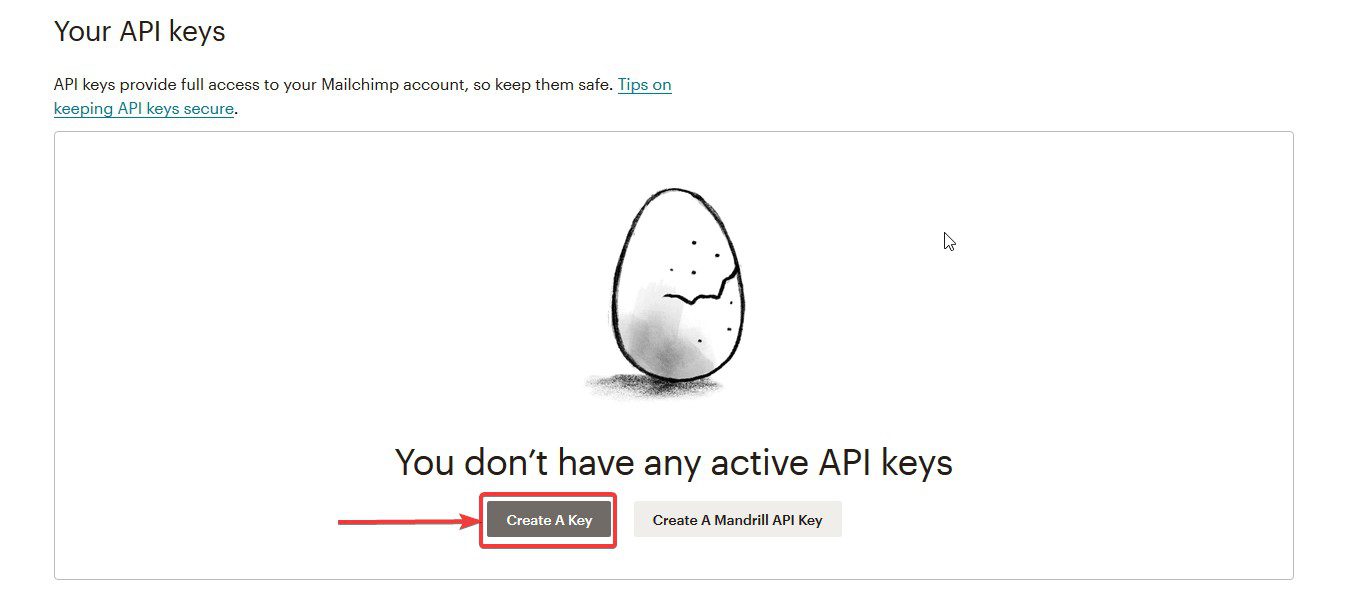
You will then be redirected to the API page of your account. Under “Your API Keys” section, click on “Create A Key” to generate your API Key.
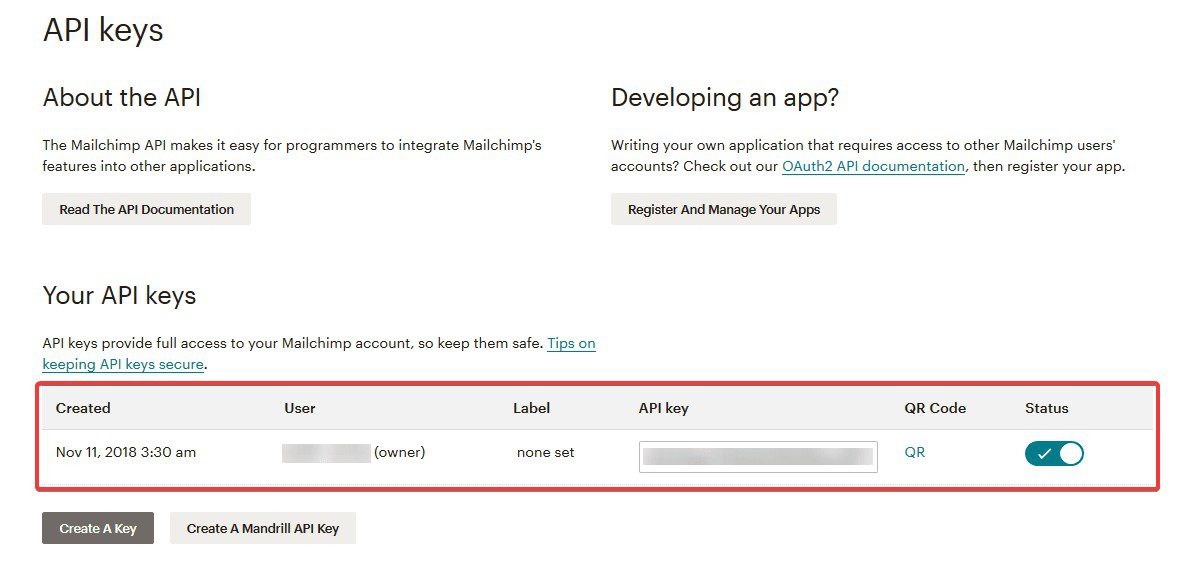
Then you would be able to view your newly generated API Key under “Your API Keys” section.
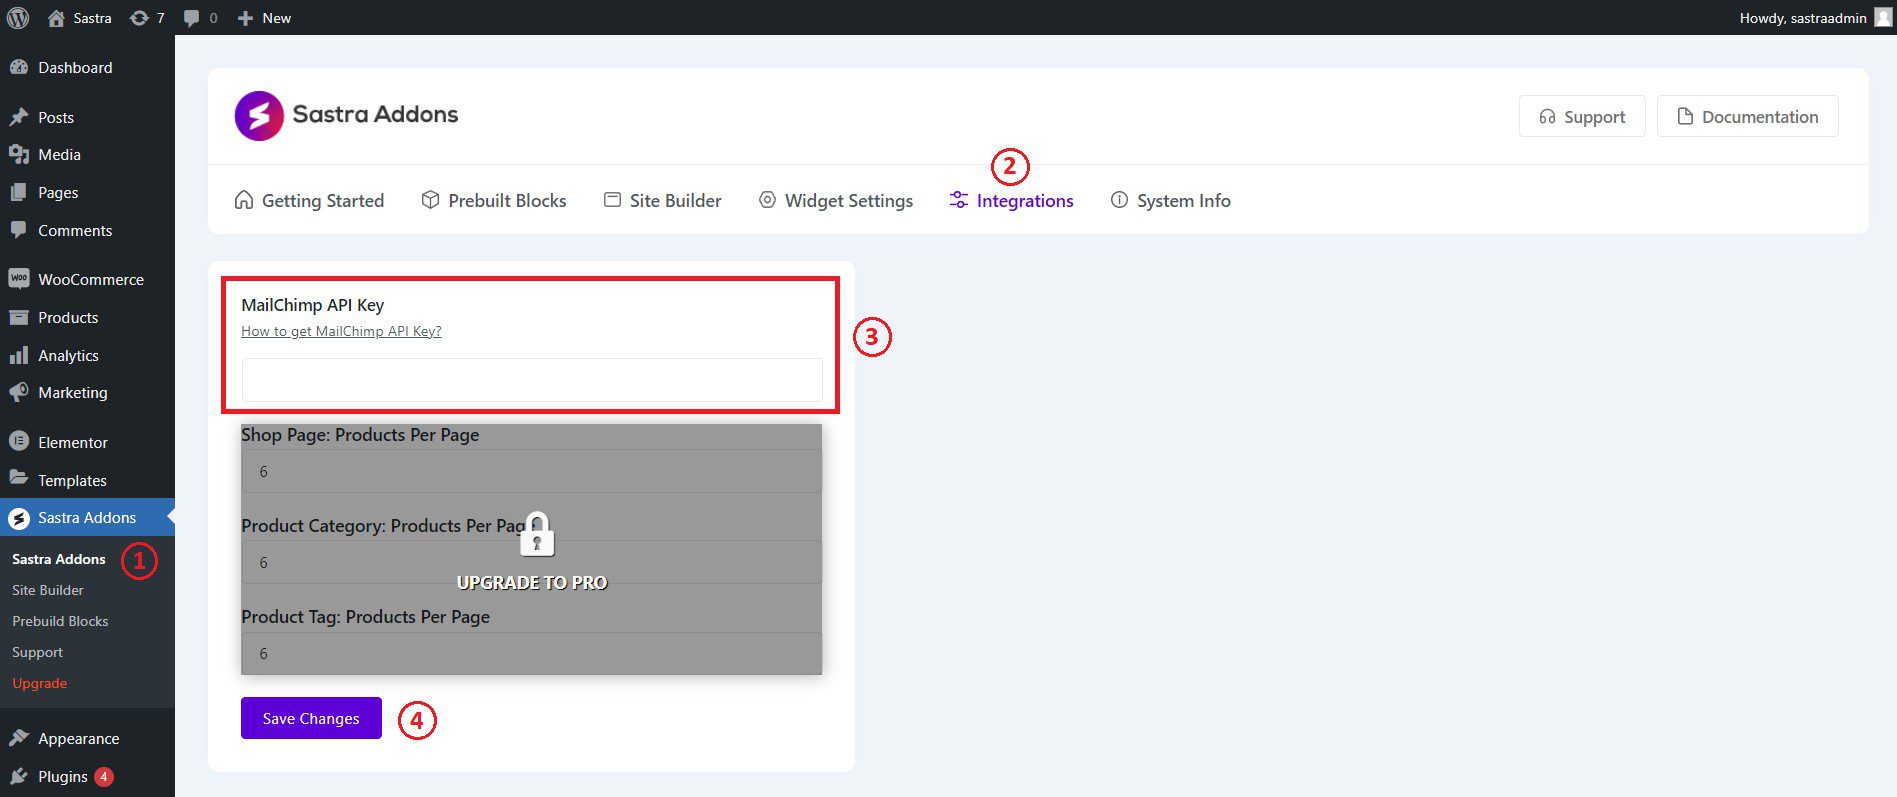
Set API Key #
After you have successfully generated your API Key, you will need to set the key inside the MailChimp API Key.
To set your API Key, go to your WordPress dashboard and navigate to wp-admin -> Spexo Addons -> Integrations. Then simply insert your API key in the MailChimp API Key option and click on ‘Save Changes’.
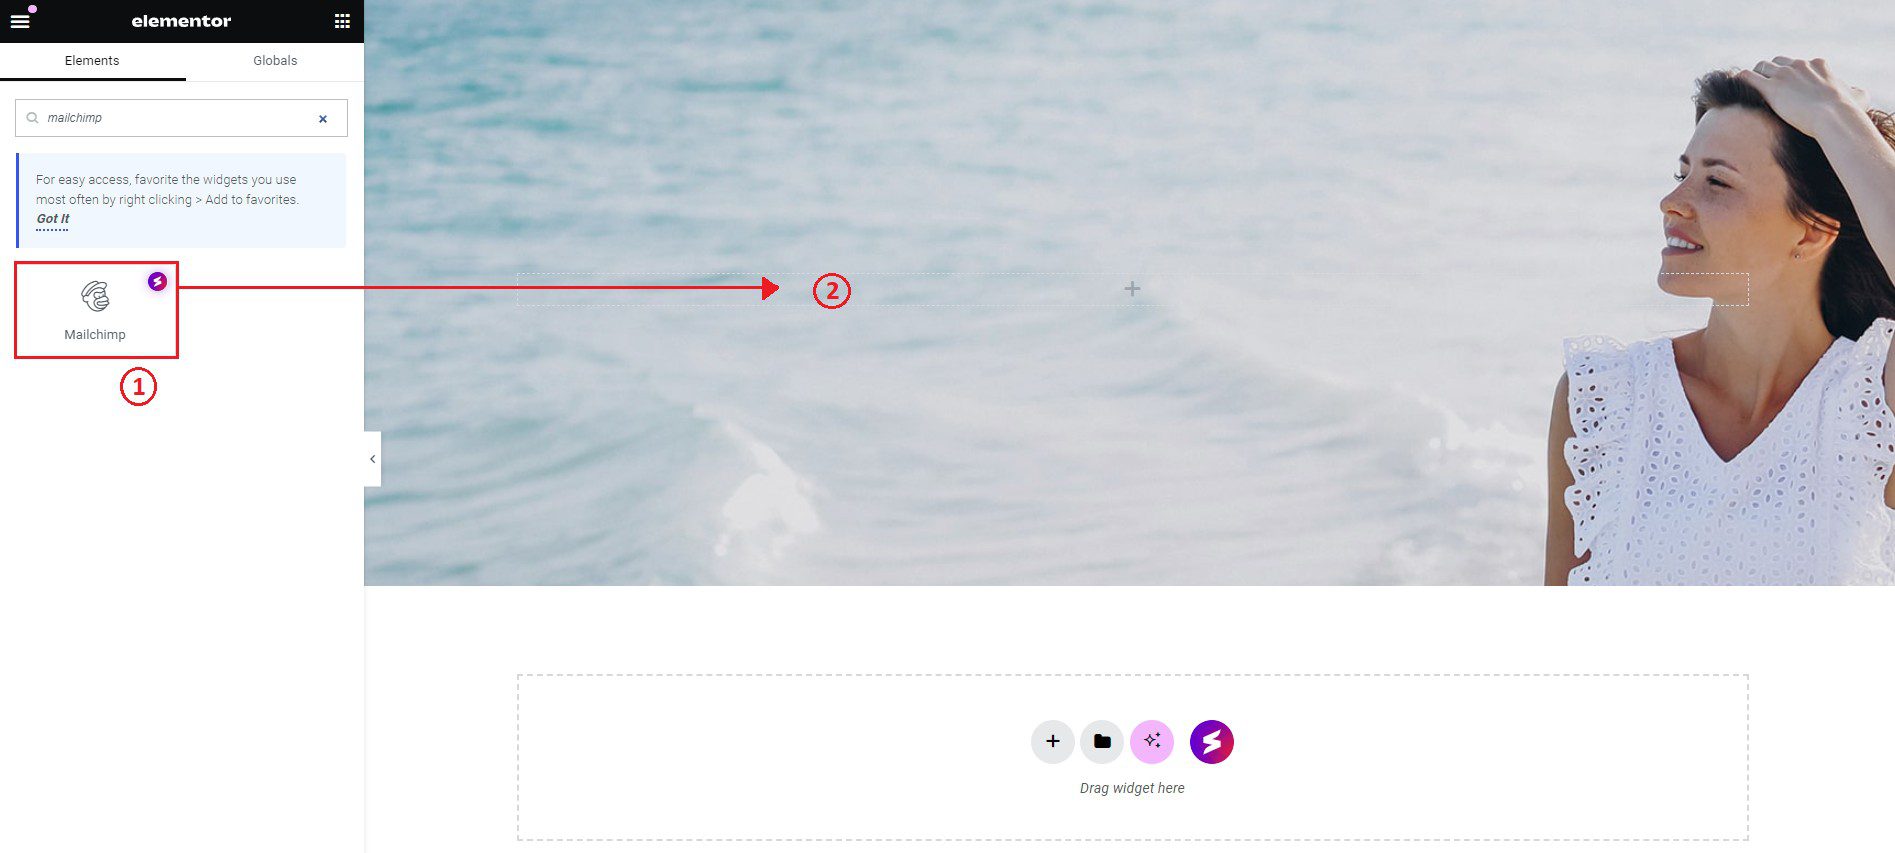
Activate MailChimp #
Find the ‘MailChimp’ from the Search option under the ‘ELEMENTS’ tab. Simply just Drag & Drop the ‘MailChimp’ into the ‘Drag widget here’ or the ‘+’ section.
Once you are done with Step 1, this is the default layout you are going to see.

How to Configure the Content Settings #
To configure the content of your MailChimp, simply click on the ‘Content’ tab.
Settings #
From this section, you can use drop-down for choose your own audience.

General #
From this section, you can use toggle for hide or display form header. If form header is display then you can set form title, form description, icon position and set icon as per your preference. Than you can set email label, email placeholder, button text and button loading text.
Moreover, you can set success message and error message as well.

Click to see Live Demo #
How to Style MailChimp #
Switch to the ‘Style’ tab to style all the Elements of MailChimp. You can add Styling to the ‘Form Field’, ‘Message’, ‘Typography’, ‘Subscribe Button’ and many more from this section.
Container #
From here, you can use drop-down for alignment. Than you can set background, border color and padding. Moreover, you can styling to border and box shadow as well.

Other Styles #
You can modify Form Header, Labels, Fields, Button & Message styling easily as per your preference.

Final Outcome #
By following the basic steps and a bit more modifying, you can style your MailChimp in however you want.

This is how you can easily showcase & style your MailChimp form on your website using MailChimp.
If you need any help, feel free to contact our dedicated support team for further assistance.